
 I already wrote a post on How To Install FFMPEG On A Webserver and when I wanted to install FFMPEG on my Macbook Pro I assumed I could follow the same procedure but I ran into some problems. First, there’s no WGET command on OSX, well not by default anyway.
Once I solved that problem, the FFMPEG installation started but failed because the Libvpx library installation failed. So hereby a step-by-step installation instruction which probably also works on previous versions of OSX.
Step 1: Xcode Command Line Tools for Mac OS X 10.9 Mavericks
Xcode Command Line Tools are part of Xcode which is a suite of development tools and libraries for OSX. Before you start, first check whether Xcode is already installed:
|
1 |
$ xcode-select -p |
If you see:
|
1 |
/Applications/Xcode.app/Contents/Developer |
Then just go to the next step, Xcode is already installed but you might want to update it to the latest version through the App Store.
To install Xcode just type a command that requires Xcode:
|
1 |
$ gcc |
You’ll get this popup:
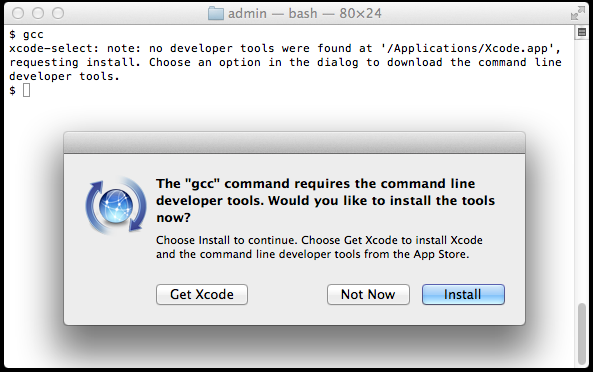
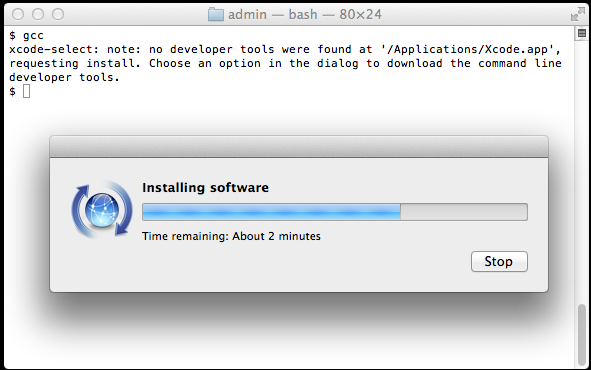
Just click “Install”:
Homebrew — MacPorts driving you to drink? Try Homebrew!
To solve the missing WGET command, you have to install Homebrew which “installs the stuff you need that Apple didn’t“.
|
1 |
ruby -e "$(curl -fsSL https://raw.github.com/Homebrew/homebrew/go/install)" |
If you have installed Macports you probably better remove it:
|
1 |
sudo mv /opt/local ~/macports |
Next, this will do the trick of installing Homebrew but you still need to install the WGET command:
|
1 |
$ brew install wget |
Installing FFMPEG
The only problem that’s left is that the Libvpx part of the FFMPEG installation script kinda blows it, which can be solve by replacing that specific part with this:
|
1 2 3 4 |
brew install -vd libvpx CFLAGS="-O3 -w -pipe" ./configure --prefix=/usr/local/Cellar/libvpx/0.9.2 make make install |
So this will result in this installation script:
|
1 2 3 4 5 6 7 8 9 10 11 12 13 14 15 16 17 18 19 20 21 22 23 24 25 26 27 28 29 30 31 32 33 34 35 36 37 38 39 40 41 42 43 44 45 46 47 48 49 50 51 52 53 54 55 56 57 58 59 60 61 62 63 64 65 66 67 68 69 70 71 72 73 74 75 76 77 78 79 80 81 82 83 84 85 86 87 88 89 90 91 92 93 94 95 96 97 98 99 100 101 102 103 104 105 106 107 108 109 110 111 112 113 114 115 116 117 118 119 120 121 122 123 124 125 126 127 128 129 130 131 132 133 134 135 136 137 138 139 140 141 142 |
mkdir -p $HOME/src $HOME/tmp export TMPDIR=$HOME/tmp export PATH="$HOME/bin:$PATH" export C_INCLUDE_PATH="$HOME/include:$C_INCLUDE_PATH" export LIBRARY_PATH="$HOME/lib:$LIBRARY_PATH" export LD_LIBRARY_PATH="$HOME/lib:$LD_LIBRARY_PATH" ########################################################### # yasm 1.2.0 # original: http://www.tortall.net/projects/yasm/releases/yasm-1.2.0.tar.gz ########################################################### cd $HOME/src wget 'http://www.tortall.net/projects/yasm/releases/yasm-1.2.0.tar.gz' tar -xzf yasm-1.2.0.tar.gz cd yasm-1.2.0 ./configure --prefix=$HOME make # 20 sec make install make distclean ########################################################### # lame 3.99.4 # original: http://sourceforge.net/projects/lame/files/lame/3.99/lame-3.99.4.tar.gz/download ########################################################### cd $HOME/src wget 'http://downloads.sourceforge.net/project/lame/lame/3.99/lame-3.99.4.tar.gz' tar -xzf lame-3.99.4.tar.gz cd lame-3.99.4 ./configure --prefix=$HOME make # 20 sec make install make distclean ########################################################### # libogg 1.3.0 # original: http://downloads.xiph.org/releases/ogg/libogg-1.3.1.tar.gz ########################################################### cd $HOME/src wget 'http://downloads.xiph.org/releases/ogg/libogg-1.3.1.tar.gz' tar -xzf libogg-1.3.1.tar.gz cd libogg-1.3.1 ./configure --prefix=$HOME make # 2 sec make install make distclean ########################################################### # libvorbis 1.2.3 # original: http://downloads.xiph.org/releases/vorbis/libvorbis-1.3.3.tar.gz ########################################################### cd $HOME/src wget 'http://downloads.xiph.org/releases/vorbis/libvorbis-1.3.3.tar.gz' tar -xzf libvorbis-1.3.3.tar.gz cd libvorbis-1.3.3 ./configure --prefix=$HOME make # 15 sec make install make distclean ########################################################### # libtheora 1.1.1 # original: http://downloads.xiph.org/releases/theora/libtheora-1.1.1.tar.bz2 ########################################################### cd $HOME/src wget 'http://downloads.xiph.org/releases/theora/libtheora-1.1.1.tar.bz2' tar -xjf libtheora-1.1.1.tar.bz2 cd libtheora-1.1.1 ./configure --prefix=$HOME make # 20 sec make install make distclean ########################################################### # libvpx @ dadc9189ed3e6a1b5efd77333e6037d2b0e2f398 # original: http://git.chromium.org/webm/libvpx.git ########################################################### cd $HOME/src brew install -vd libvpx CFLAGS="-O3 -w -pipe" ./configure --prefix=/usr/local/Cellar/libvpx/0.9.2 make make install ########################################################### # faac 1.28 # original: http://downloads.sourceforge.net/faac/faac-1.28.tar.gz ########################################################### cd $HOME/src wget 'http://downloads.sourceforge.net/faac/faac-1.28.tar.gz' tar -xzf faac-1.28.tar.gz cd faac-1.28 # fix programming error sed -i '126d' ./common/mp4v2/mpeg4ip.h ./configure --prefix=$HOME make # 6 sec make install make distclean ########################################################### # libx264 @ da19765d723b06a1fa189478e9da61a1c18490f8 # original: git://git.videolan.org/x264.git ########################################################### cd $HOME/src git clone git://git.videolan.org/x264.git cd x264 ./configure --prefix=$HOME --enable-static --enable-shared make # 45 sec make install make distclean ########################################################### # libxvid 1.3.2 # original: http://downloads.xvid.org/downloads/xvidcore-1.3.2.tar.gz ########################################################### cd $HOME/src wget 'http://downloads.xvid.org/downloads/xvidcore-1.3.2.tar.gz' tar -xzf xvidcore-1.3.2.tar.gz cd xvidcore/build/generic ./configure --prefix=$HOME make # 15 sec make install make distclean ########################################################### # ffmpeg @ d00bc6a8fdc86c8cfc987e8c13736909bd9af809 # original: git://source.ffmpeg.org/ffmpeg.git ########################################################### cd $HOME/src git clone --depth 1 git://git.videolan.org/ffmpeg cd ffmpeg ./configure --prefix=$HOME --libdir=$HOME/lib \ --incdir=$HOME/include --enable-libfaac --enable-libx264 --enable-libxvid \ --enable-nonfree --enable-gpl --enable-libmp3lame --enable-pthreads --enable-libvpx \ --enable-libvorbis --disable-mmx --enable-shared --enable-libtheora \ --pkg-config=pkg-config --enable-version3 --enable-pic \ --extra-cflags="-I$HOME/include" --extra-ldflags="-L$HOME/lib" make # 6.25 min make install |
The script will at some points create some warnings mainly caused by unused options but that won’t effect the installation. Simply copy this script (to any location) on your web server, name it build_ffmpeg.sh and run this command:
|
1 |
bash build_ffmpeg.sh | tee build_ffmpeg.log |
If you want to check whether the installation was successful, type:
|
1 2 3 |
export PATH="$HOME/bin:$PATH" export LD_LIBRARY_PATH="$HOME/lib:$LD_LIBRARY_PATH" ffmpeg -version |
This should give the following output:
|
1 2 3 4 5 6 7 8 9 10 |
ffmpeg version git-2013-08-31-b043d80 built on Aug 31 2013 12:16:07 with gcc 4.4.7 (GCC) 20120313 (Red Hat 4.4.7-3) configuration: --prefix=/home/sangatpedas --libdir=/home/sangatpedas/lib --incdir=/home/sangatpedas/include --enable-libfaac --enable-libx264 --enable-libxvid --enable-nonfree --enable-gpl --enable-libmp3lame --enable-pthreads --enable-libvpx --enable-libvorbis --disable-mmx --enable-shared --enable-libtheora --pkg-config=pkg-config --enable-version3 --enable-pic --extra-cflags=-I/home/sangatpedas/include --extra-ldflags=-L/home/sangatpedas/lib libavutil 52. 43.100 / 52. 43.100 libavcodec 55. 29.100 / 55. 29.100 libavformat 55. 15.100 / 55. 15.100 libavdevice 55. 3.100 / 55. 3.100 libavfilter 3. 82.102 / 3. 82.102 libswscale 2. 5.100 / 2. 5.100 libswresample 0. 17.103 / 0. 17.103 |
Edit Your .BASH_PROFILE
To be able to run FFMPEG at run time you need to make the following settings which you can also put into into your $HOME/.bash_profile file to set them automatically at login.
Step 1: Start Terminal
Step 2: Edit .bash_profile
|
1 2 |
cd ~ nano .bash_profile |
This will open the (hidden) file .bash_profile or create a new one if it doesn’t exist.
Step 3: Make the changes and save
Now you can make a simple change to the file. Paste these lines of code to change your Terminal prompt.
|
1 2 |
export PATH="$HOME/bin:$PATH" export LD_LIBRARY_PATH="$HOME/lib:$LD_LIBRARY_PATH" |
Next save the file by clicking
ctrl+o followed by
ctrl+x to exit the editor.
To immediately activate your changes type
source .bash_profile
That’s all!